Cloudflare R2 Storage
Configure Cloudflare R2 Storage for file uploads
NimeraCP utilizes Cloudflare R2 Storage for file uploads. This is a free service that provides a CDN for your files.
Create a Cloudflare Account
Go to Cloudflare and create an account.
Once you have created an account, you will be redirected to the dashboard.
Create a R2 Bucket
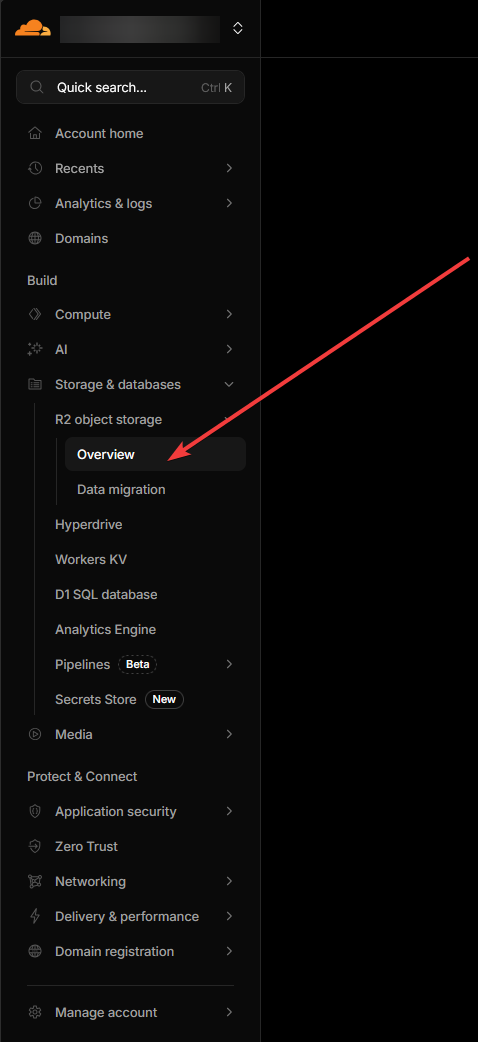
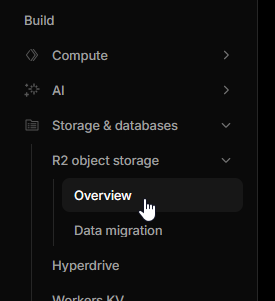
Click on Storage & databases -> R2 object storage -> Overview.
On the R2 object storage page, click on Create bucket. Pick a name for your bucket, pick the automatic and standart option and click on Create bucket.
Info
Bucket names can only contain lower-case letters, numbers, and hyphens, for example test-bucket.
Adding a custom domain
Cloudflare R2 Storage allows you to add a custom domain to your bucket. This is useful if you want to use your bucket with a custom domain (Like a subdomain: https://cdn.l2server.com).
To add a custom domain, go to your bucket settings and then you will see a section called Custom Domains. Click on Add.
Then there wil be a modal opening up on the right side of the screen. First, you need need to add a domain name, for example cdn.<your-domain>.com.
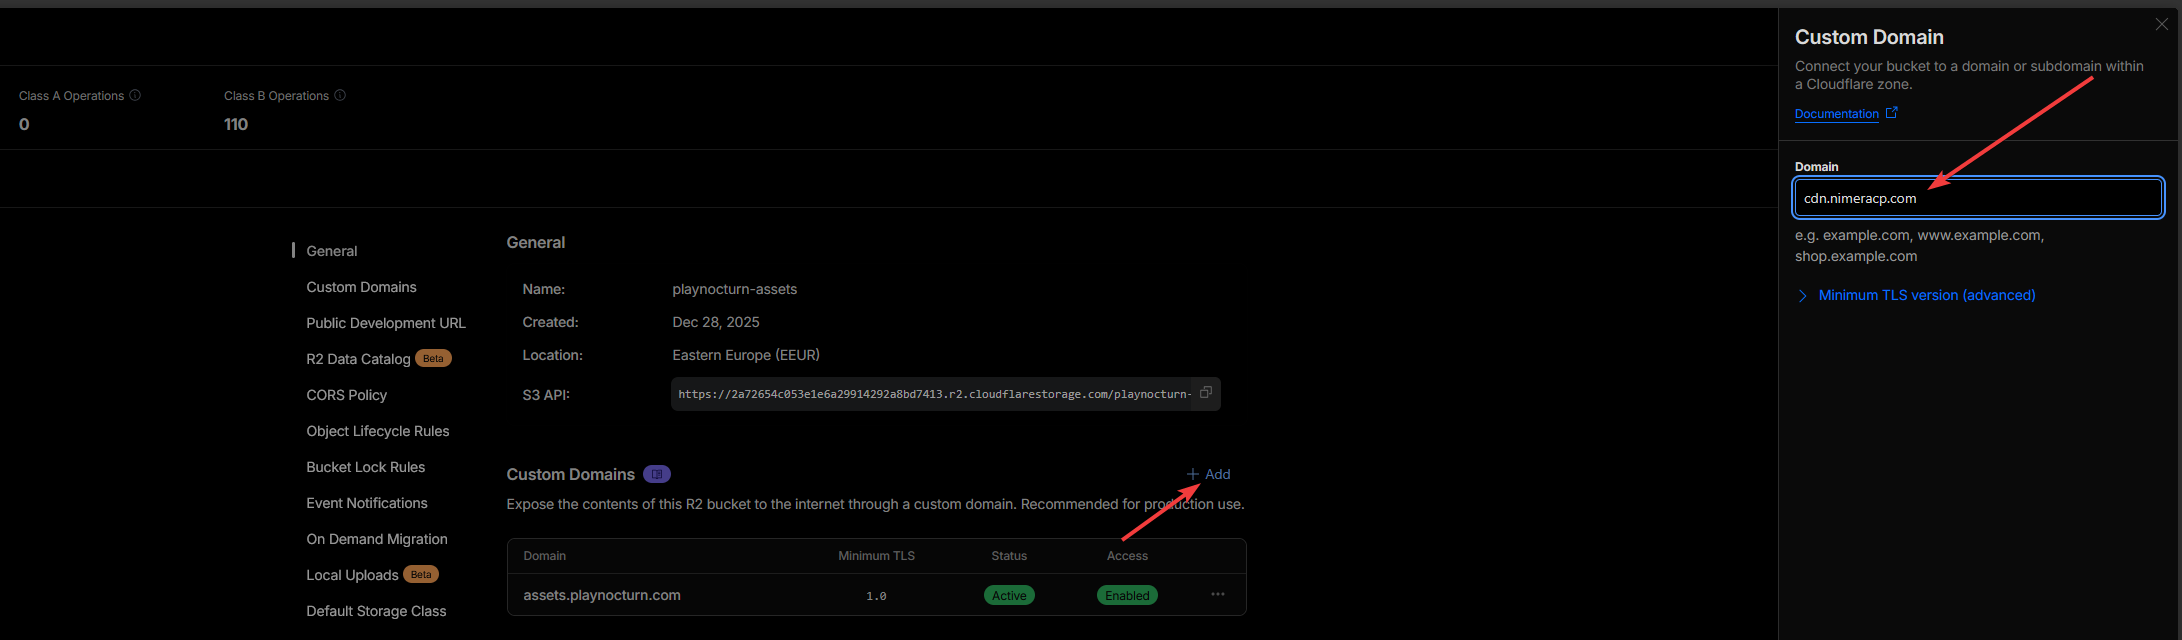
Click on Continue and then Connect domain.
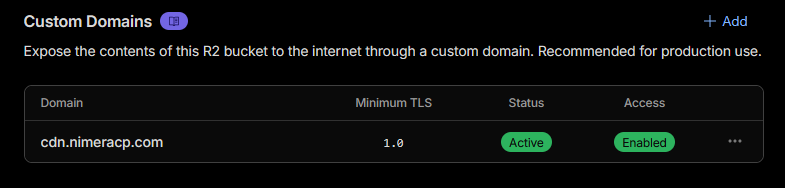
The status will change from Initializing to Active. This means that the domain is ready to use. This will take a while to create, so be patient. Once it's done, you will see your created custom domain in the list.
Configure CORS Policy
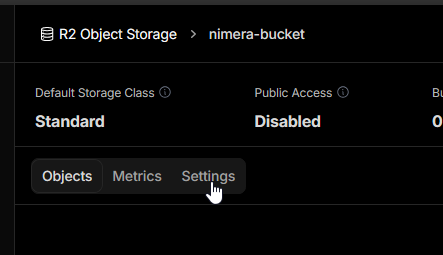
Go to your bucket and click on Settings above on the tabs.
You will see a section called CORS Policy. Click on Add. Then there wil be a modal opening up on the right side of the screen. In there you need to add the following code:
[
{
  "AllowedOrigins": [
    "http://localhost:3000",
    "https://<your-panel-domain>.com"
  ],
  "AllowedMethods": [
    "GET",
    "PUT"
  ]
}
]
Info
Make sure to replace <your-panel-domain>.com with your NimeraCP Panel Domain.
Then click on Save.
Retrieving API Keys
The Cloudflare R2 Storage integration also requires API Keys to communicate with the Cloudflare API. To retrieve these keys, go to your R2 object storage overview.
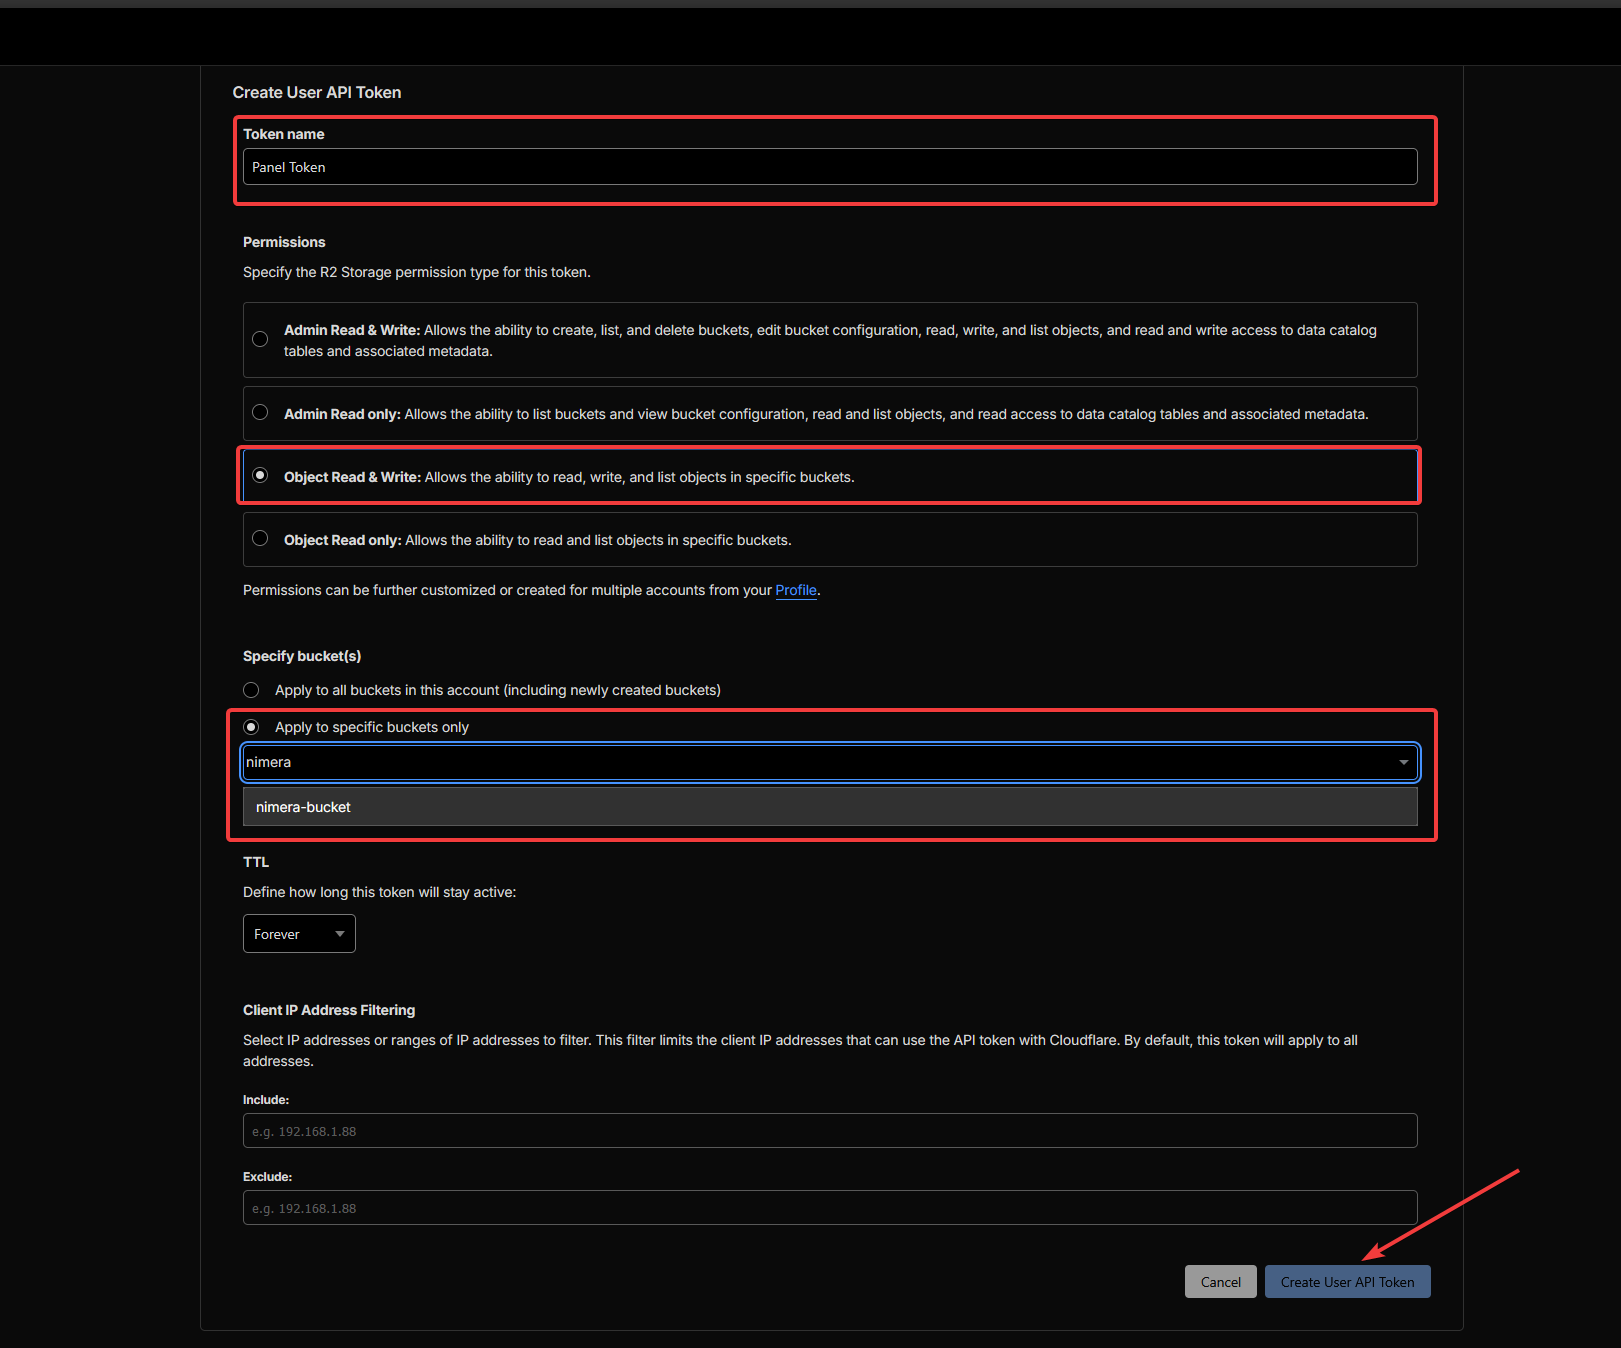
Then on the right side of the screen, you see a section called Account Details. Click on Manage. This will redirect you to the API Keys management page. Click on Create User API Token.
Give your token a name, for example Panel Token (Permission: Object Read & Write), Specify your bucket that you created in the step above, and click on Create User API Token.
Once you have created your token, you will see a new page with all the keys. The ones you need are:
Access Key IDSecret Access Key
Copy these and save them in a notepad.
There's one thing left we need to retrieve, that is the Endpoint URL. To do this, go back to your R2 object storage overview and on the right side of the screen, you see your account details.
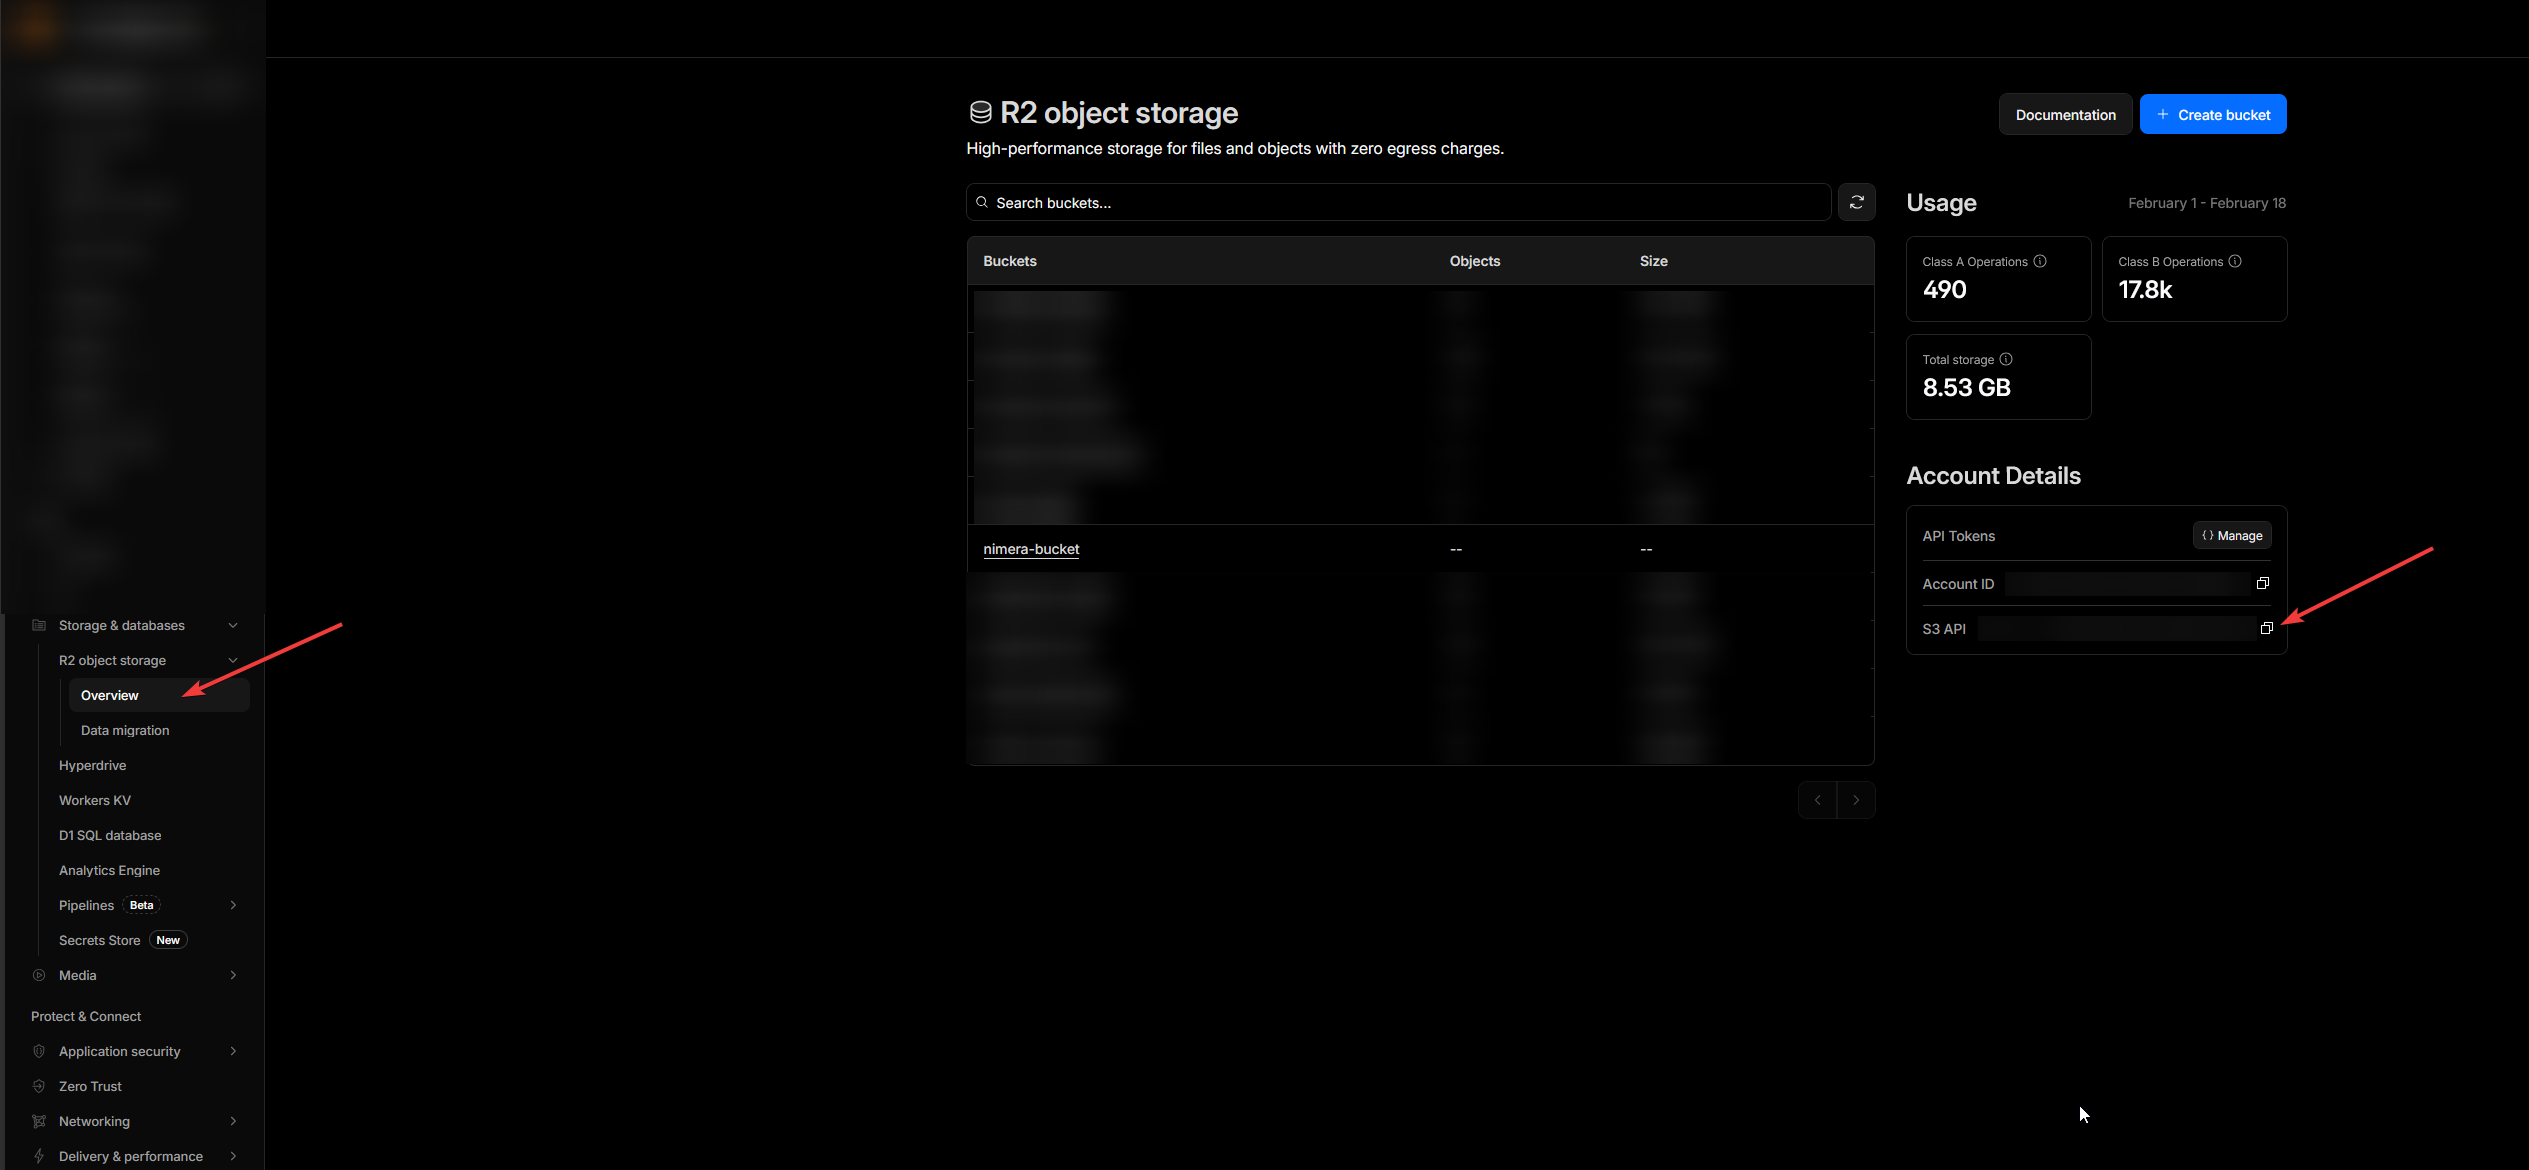
The Endpoint URL is the S3 API URL, it should look something like https://xxxxx.r2.cloudflarestorage.com.
Copy this and save it in a nodepad where you have all your other keys are located at.
Applying the API Keys
These keys are needed to configure the NimeraCP Panel. To apply the keys, go to your Dokploy Panel -> Your Panel instance -> Environment.
There you enter the keys you have pasted in your notepad.
Edit this block:
# CloudFlare R2
R2_ENDPOINT=https://xxxxx.r2.cloudflarestorage.com
R2_ACCESS_KEY_ID=<your-access-key-id>
R2_SECRET_ACCESS_KEY=<your-secret-access-key>
R2_BUCKET_NAME=<your-bucket-name>
R2_PUBLIC_URL=<your-custom-bucket-domain>
Info
Make sure to enter the keys without the < and > symbols, like for the R2_ACCESS_KEY_ID key.
Save the changes, go back to General and click on Reload. This will apply all the Environment Variables and restart the Web Server.
Testing the integration
To test the integration, go to your NimeraCP Admin Panel -> Theme Editor -> Upload a logo. After the refresh, you should now see your uploaded logo in the NimeraCP Panel.
If you have any questions or issues, please join our Discord and ask in the 〃ᴜsᴇʀs〃・ɢᴇᴛ〻sᴜᴘᴘᴏʀᴛ channel.